
DHT22: Measuring temperature and humidity with the ESP32 in Arduino code
(Updated at 01/06/2023)
The DHT22 is the big brother of the DHT11, the low-cost temperature and humidity sensor for DIY projects.
Warning
It offers better measurement accuracy but has the same limitation as the DHT11: a low number of measurements per second (0.5Hz, or 1 measurement every 2 seconds)!
Getting started with the DHT22 sensor
The DHT22 is part of the DHTxx family. A comparison between the DHT11 and the DHT22 is available to see their differences better. The DTH22 has a white plastic housing, while the DHT11 has a blue one. If your sensor is blue, I recommend reading the DHT11 tutorial .
Note
Sometimes the DHT22 is designated by the reference AM2302.
Characteristics of the DHT22 sensor
Note
The DHT22 is more suitable than the DHT11 for measuring temperatures outdoors, as it can measure temperatures down to -40°C. For an IoT greenhouse, for example, the DHT22 is recommended!
The performance of the DHT22 is really basic and less reliable than the BMExxx sensors from the manufacturer Bosh. In the end, it all depends on your application. 😉
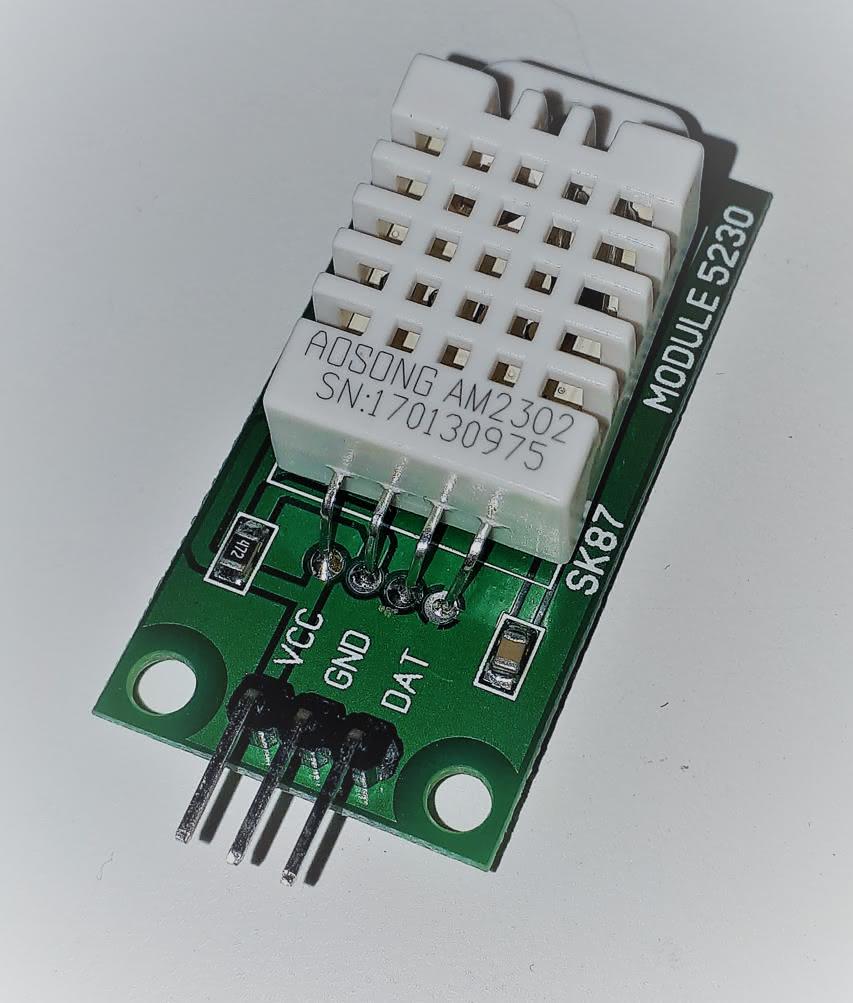
Connections of the DHT22 sensor
The DHT22 sensor has between 3 and 4 pins depending on your module. The sensor has 4 pins, but since one is useless, the modules that integrate it only expose the 3 useful pins. Beware because there are several variations of the pin-out of the DHT22 module, depending on the manufacturer.
The numbering is done from the left when you hold the sensor facing you (the part with the grid in front of you). The power supply is always the first pin; the others may vary.
Apart from the power supply pins, the DHT22 has a single pin to transmit sensor data.
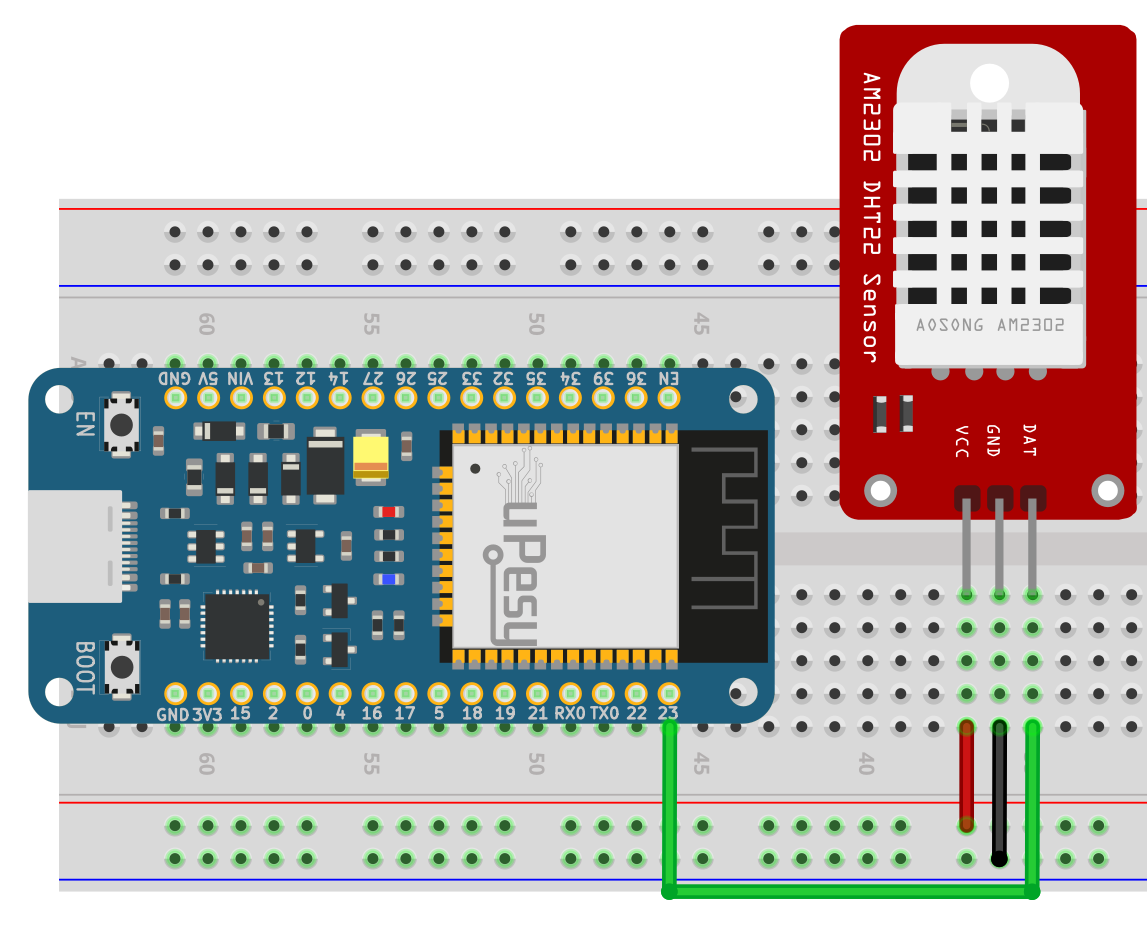
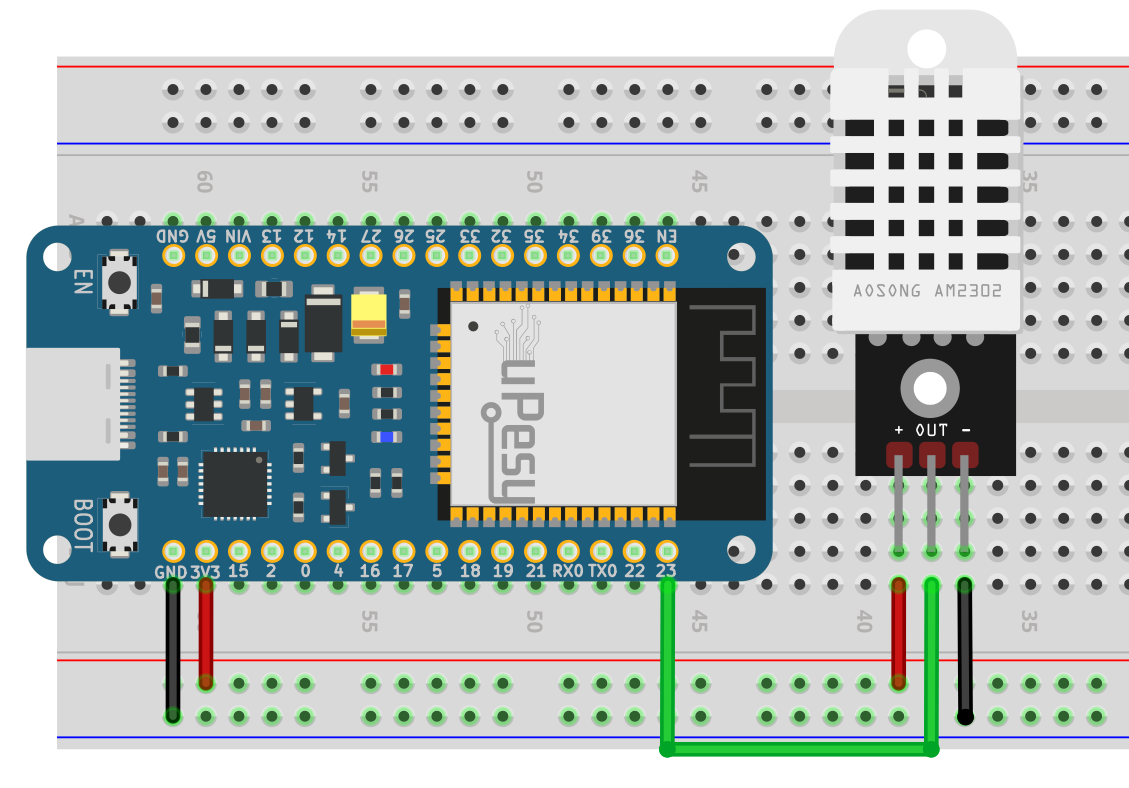
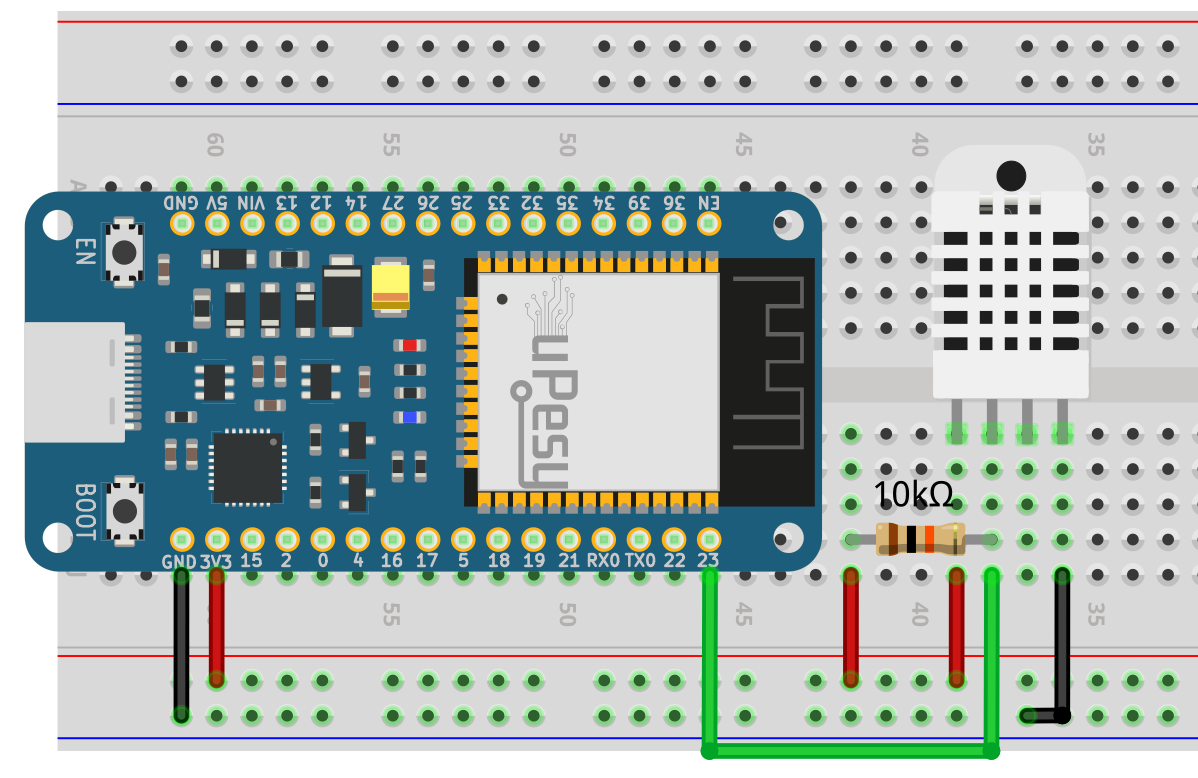
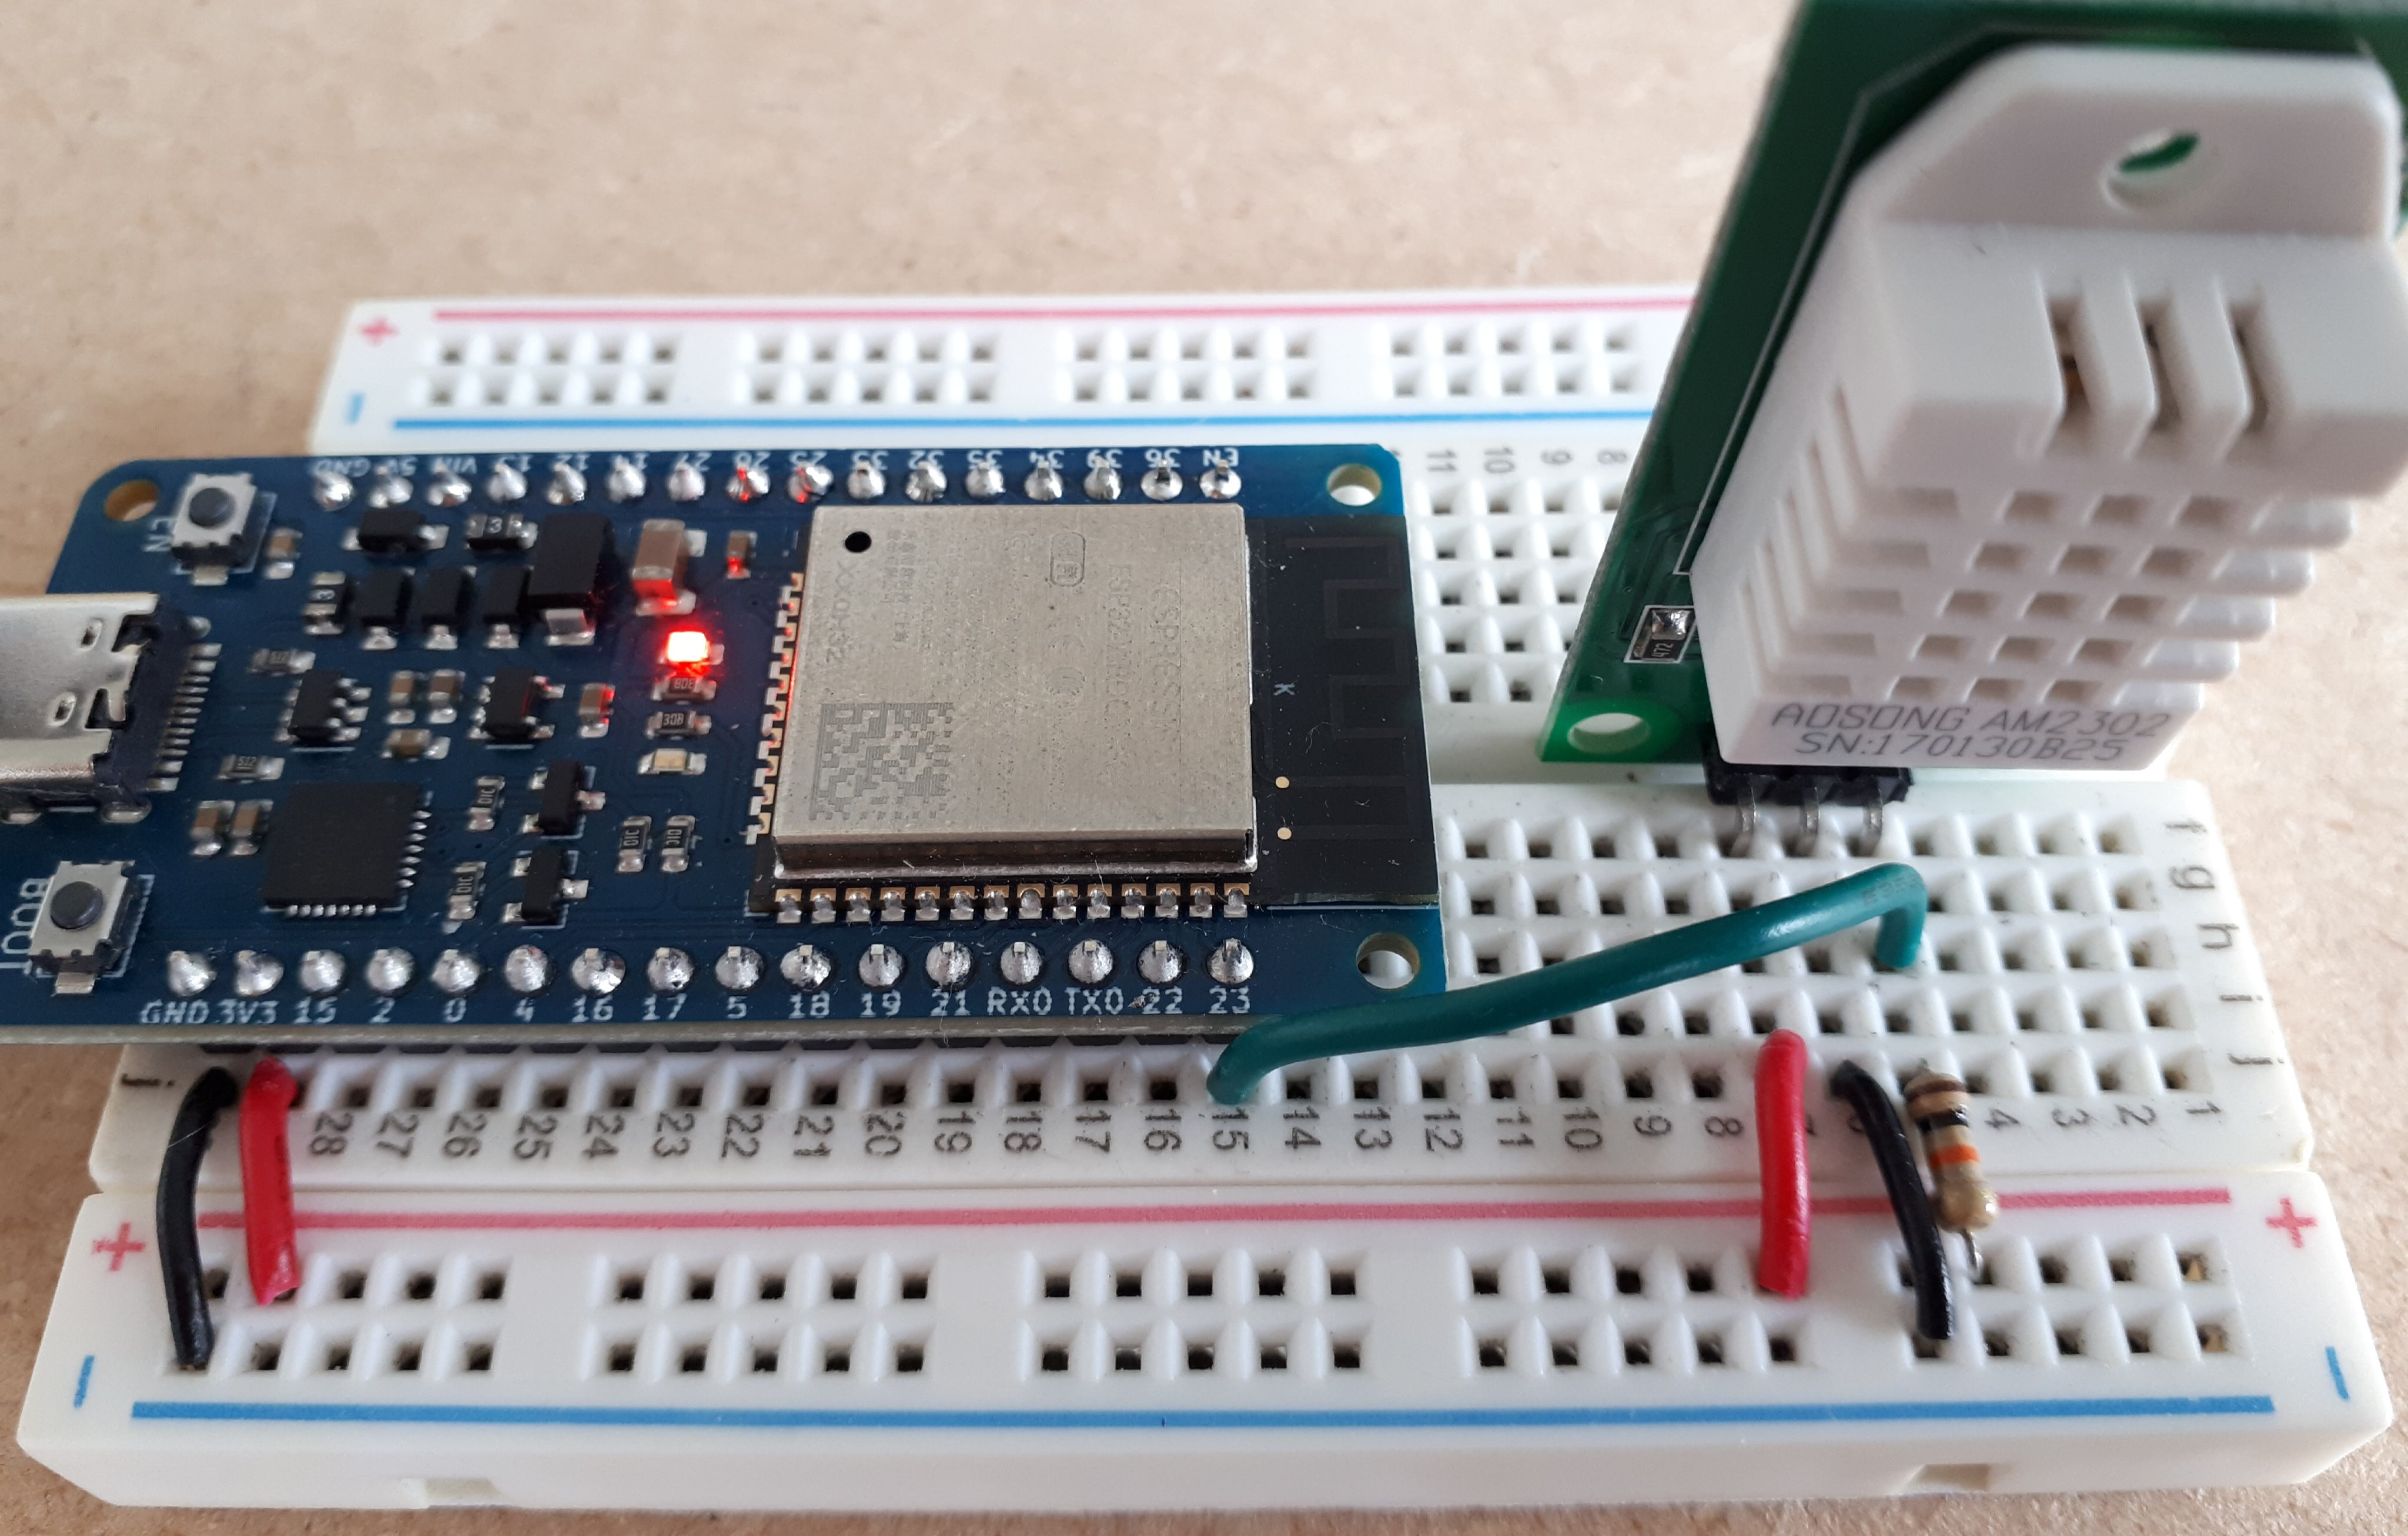
Wiring diagram for using the DHT22 module with an ESP32
If the module does not contain a pull-up resistor, you must add one between 4.7kΩ to 10kΩ between the pins 3V3 and the signal (GPIO23 ). You can always add one more; it won’t hurt 😉
Any output pin can be used. Here we use the pin GPIO23 . Don’t forget to adapt the circuit to your model if it is slightly different. 🙂
Warning
Supply the module with 3.3V and not 5V to have a 3.3V data signal.
Measuring the temperature and humidity on the DHT22 module with Arduino code
It would help if you used a library to communicate with the DHT22, which uses a proprietary protocol. I recommend the dHT Sensor library from Adafruit , which is compatible with ESP32.

Once installed, the following code can retrieve temperature and humidity from the DHT22.
#include "DHT.h"

#define DHTPIN 23
#define DHTTYPE DHT22

DHT dht(DHTPIN, DHTTYPE);

void setup() {
  Serial.begin(115200);
  dht.begin();
}

void loop() {
  delay(2000);
  // The DHT22 returns at most one measurement every 2s
  float h = dht.readHumidity();
  // Reads the humidity in %
  float t = dht.readTemperature();
  // Reads the temperature in degrees Celsius
  float f = dht.readTemperature(true);
  // true returns the temperature in Fahrenheit

  if (isnan(h) || isnan(t) || isnan(f)) {
    Serial.println(F("Failed reception"));
    return;
    // Returns an error if the ESP32 does not receive any measurements
  }

  Serial.print("Humidite: ");
  Serial.print(h);
  Serial.print("%  Temperature: ");
  Serial.print(t);
  Serial.print("°C, ");
  Serial.print(f);
  Serial.println("°F");
  // Transmits the received measurements to the serial terminal via USB
}
Note
The DHT.h at the beginning of the program includes the library DHT Sensor .
This is what you get in the console:

Note
You can blow on the DHT22 sensor like a frost-covered window. You should see a rapid increase in humidity.
Calculate the heat index | Feel temperature
To calculate this felt temperature, we can use the heat index . This is a value in °C based on the air’s temperature and relative humidity. The higher the humidity in the air at a given temperature, the higher the temperature felt. The DHT Sensor library provides a built-in function to calculate this, called computeHeatIndex() .
#include "DHT.h"

#define DHTPIN 23
#define DHTTYPE DHT22

DHT dht(DHTPIN, DHTTYPE);
This section is available to premium members only. You still have 68% to discover.
Subscribe for only 5$/monthAlready subscribed? Sign in