
DHT11: Measuring temperature and humidity with ESP32 in MicroPython
(Updated at 01/05/2023)
The DHT11 sensor is viral among makers and DIY enthusiasts. It is so popular that it is included in MicroPython by default. Its low price and ease of use are the main reasons for this.
Warning
The main drawback is that you can only take a measurement once a second. However, this will be fine for making a DIY IoT weather station. 🙂
Getting started with the DHT11 sensor
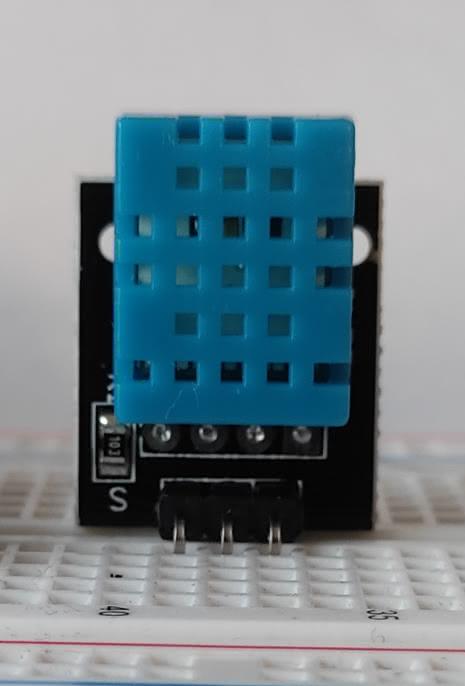
The DHT11 and DHT22 sensors are used similarly but have some differences. The DHT11 has a blue housing, while the DHT22 has a white housing and is slightly larger. If you’d like to learn more about the differences, please look at this comparison. The DHT22 is the more advanced model and is more complete.
Some technical characteristics of the DHT11
The DHT11 can be powered directly by the 3.3V voltage of the ESP32.
Features |
DHT11 |
|---|---|
Temperature accuracy |
± 2°C |
Humidity accuracy |
± 5% |
Temperature range |
0-50 °C |
Humidity range |
20-90% |
Sampling |
1/s |
Supply voltage |
3-5.5V |
Current |
~2.5mA |
Since the DHT11 measurements are straightforward, I suggest you use a BMExxx series sensor from the manufacturer Bosh for more accurate measurements. Of course, the cost is not the same. 😉
DHT11 Sensor Wiring on ESP32
The DHT11 sensor has between 3 and 4 pins depending on your module. If it has 4, one of them is not needed. Unfortunately, the type of pin-outs used depends on the module manufacturer. The numbering is done from the left when you hold the sensor facing you (the part with the grid in front of you). Here is a summary of the different possibilities:

In addition to the pins supplying power to the DHT11, a single pin is used to send out the sensor data.
Electrical circuit for using the DHT11 module with an ESP32
If your module does not have a pullup resistor, you may need to add one. Connect a 4.7kΩ to 10kΩ resistor between pins <span style=’color:gray’>``3V3`` </span> and the signal <span style=’color:gray’>``(GPIO17)`` </span>. It doesn’t hurt to add a resistor, even if it’s not strictly necessary.
Any output pin can be used for the following circuits, with <span style=’color:gray’>``GPIO17`` </span> as an example. The DHT11 sensor is from Elegoo, so modify it according to your model if it differs. 🙂
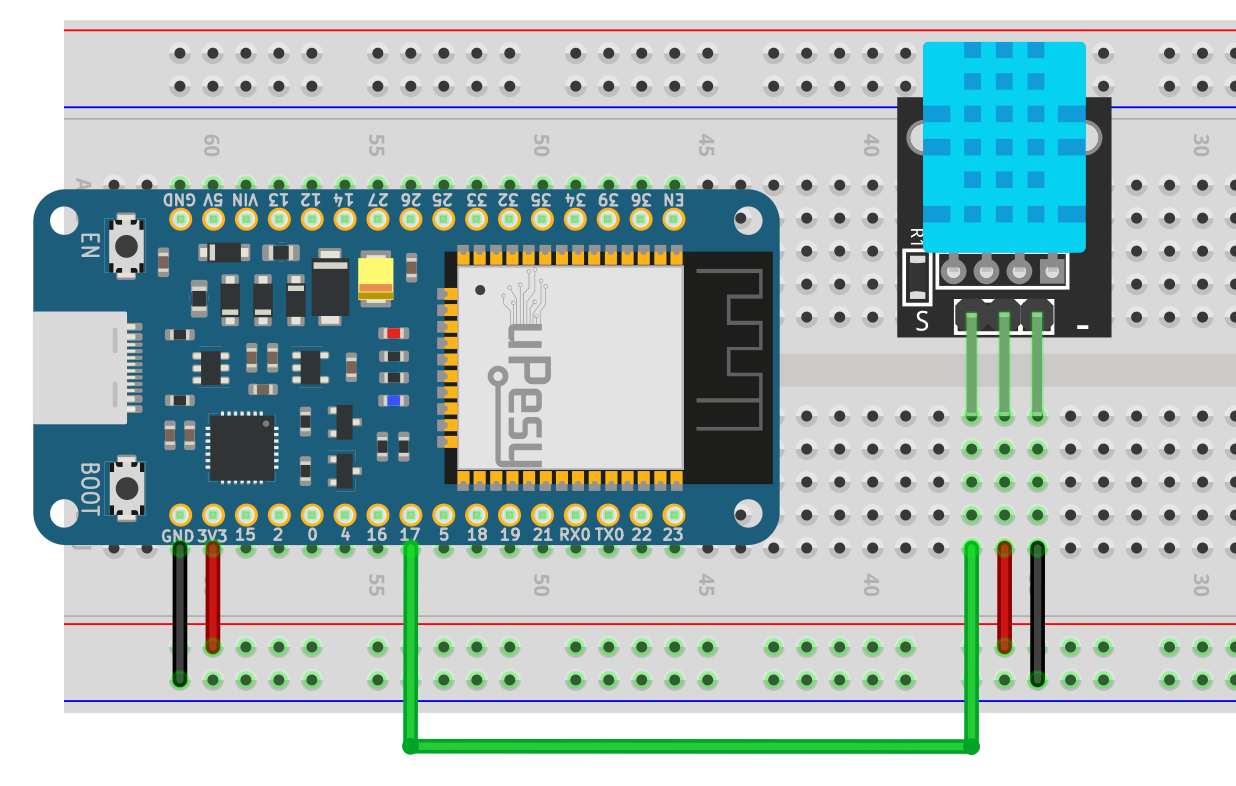
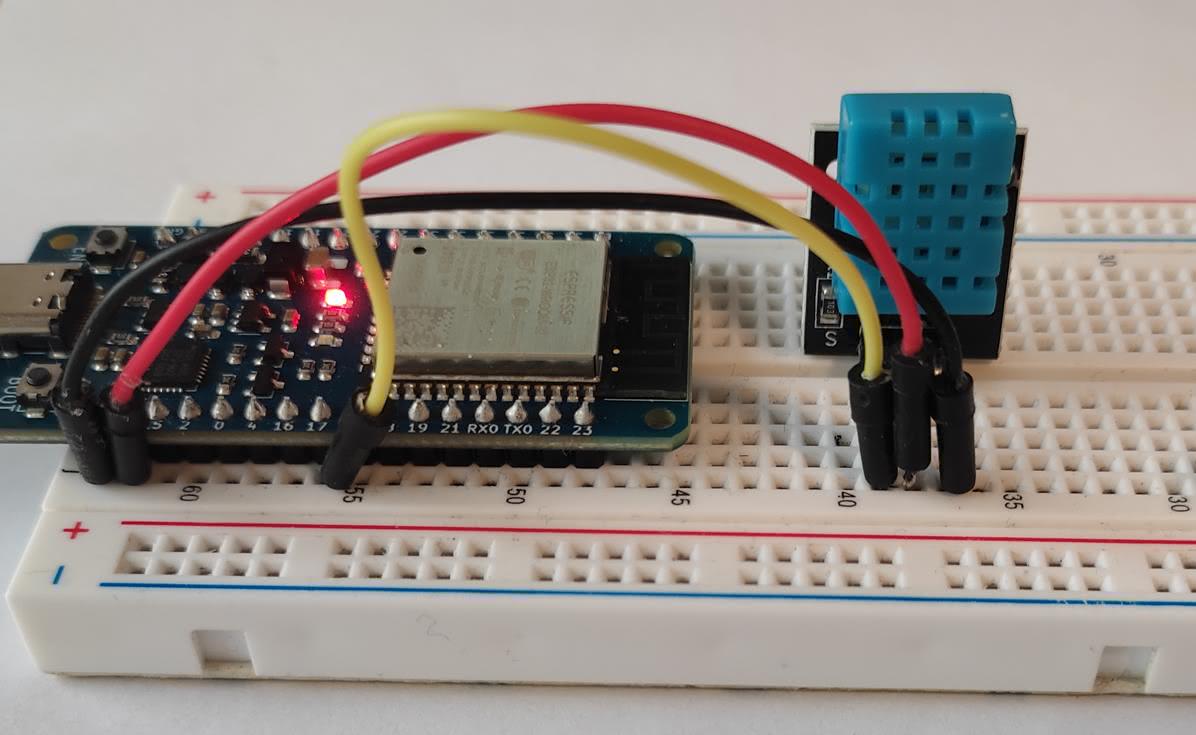
Wiring the DHT11 with a uPesy ESP32 Wroom DevKit on a breadboard
Warning
Please ensure the module is provided with 3.3V instead of 5V to get a digital signal at 3.3V.
Measuring the temperature and humidity of the DHT11 with MicroPython
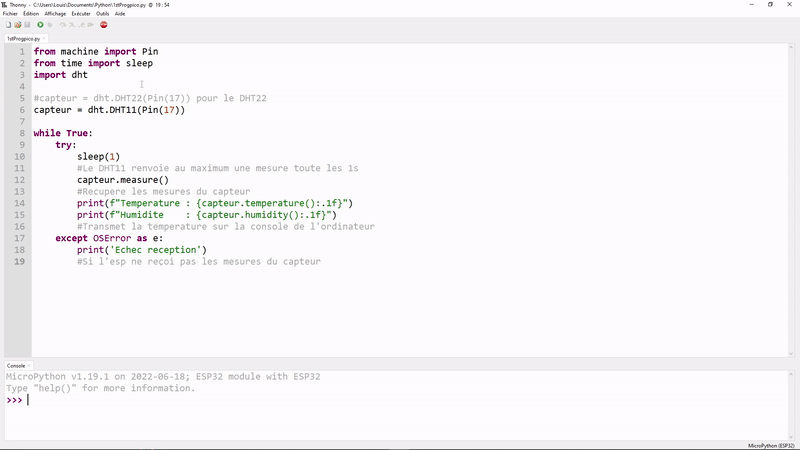
To communicate with a DHT11 sensor, you’ll need to use a library as it uses a proprietary protocol. The good news is that MicroPython has this library built in, so you won’t have to download anything extra! 😎
The code is simple: instantiating a dht with a PIN and using the sensor.measure() .
from machine import Pin
from time import sleep
import dht

sensor = dht.DHT11(Pin(17))

while True:
    try:
        sleep(1)
        # The DHT11 returns at most one measurement every 1s
        sensor.measure()
        # Retrieves measurements from the sensor
        print(f"Temperature : {capteur.temperature():.1f}")
        print(f"Humidity    : {capteur.humidity():.1f}")
        # Transmits the temperature to the computer console
    except OSError as e:
        print('Failed reception')
        # If esp does not receive the measurements from the sensor
Note
One second is added between each measurement because the DHT11 cannot go faster😮💨. If the DHT11 fails to keep up, an error will be captured thanks to the try: except: !
This is what is displayed in the Thonny IDE terminal. The temperature is expressed in degrees Celsius, while the humidity is expressed in percent.
Note
You can blow on the DHT11 sensor like a frosted window to remove fog.
In Python, you can use f-string to display variables with text easily f"Humidity {capteur.humidity():.1f}" . The string must start with an f , and the variable should be enclosed in square brackets. You can also specify the number of digits after the decimal point that should be displayed with .1f
Warning
You could even put zero because the sensor is only accurate to one degree!
Making asynchronous measurements with the DHT11 sensor
When using an ESP32, you may observe that it cannot perform any other tasks while measurements are being taken. This is due to the measurement process blocking the device from completing other operations.
The DHT22 is a more advanced model of the DHT11 sensor. A simple way to differentiate the two models is to look at the housing color: the DHT11 is blue, while the DHT22 is white. Additionally, the DHT22 is slightly larger. Despite the differences, the two sensors are used in the same way. For more information on the differences between the two, check out this comparison.
This section is available to premium members only. You still have 37% to discover.
Subscribe for only 5$/monthAlready subscribed? Sign in