
Using the Pi Pico with the Arduino IDE
(Updated at 03/16/2023)
The support on Arduino IDE for Pi Pico boards was not long in coming. It is now possible to program the Raspberry Pi Pico board with Arduino code directly from the Arduino IDE. Adding the support is similar to installing the ESP32 boards via the additional board manager via the Arduino IDE.
Installation of the Arduino IDE software
If you still don’t have the Arduino IDE installed, you can refer to the first part of the tutorial for the ESP32. The installation of the software itself is straightforward.
Add the RP2040 support in the Arduino IDE.
To install the necessary tools for the Pi Pico, you need to :
Go to File → Preferences
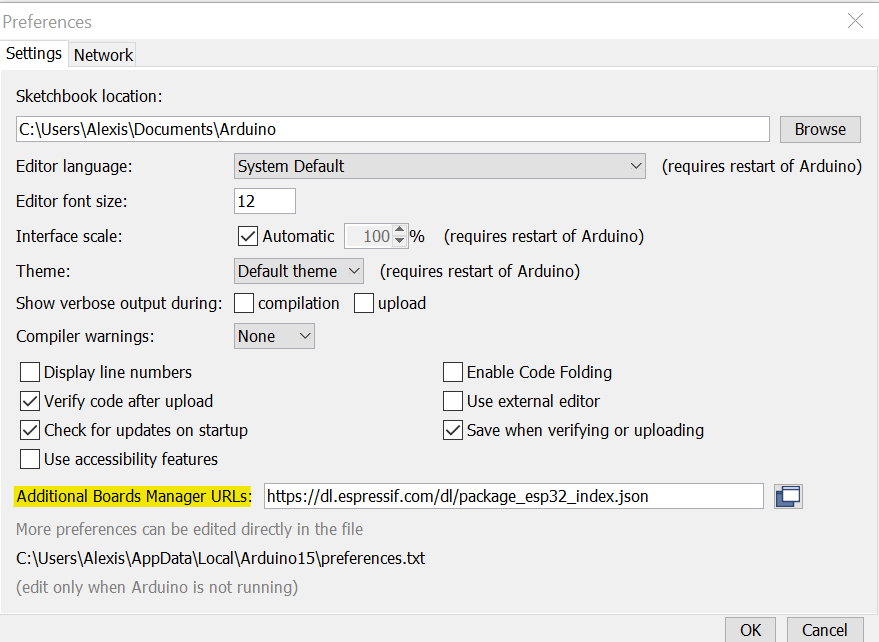
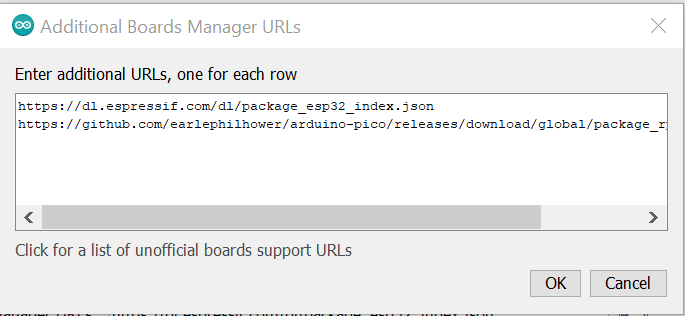
Click on Additional Boards managers URLs and add the following URL :
https://github.com/earlephilhower/arduino-pico/releases/download/global/package_rp2040_index.json
Collection of URLs to manage additional boards (ESP32, Raspberry Pi Pico)
Warning
You should not remove the existing URLs if you also coding on ESP8266/ESP32 boards from the Arduino IDE. Click on OK to save the new URL.
Then you must go to the board manager Tools → Board → Boards manager . Scroll down until you find Raspberry Pi Pico/RP2040 and click on install. The installation of the development tools is done automatically; just wait.
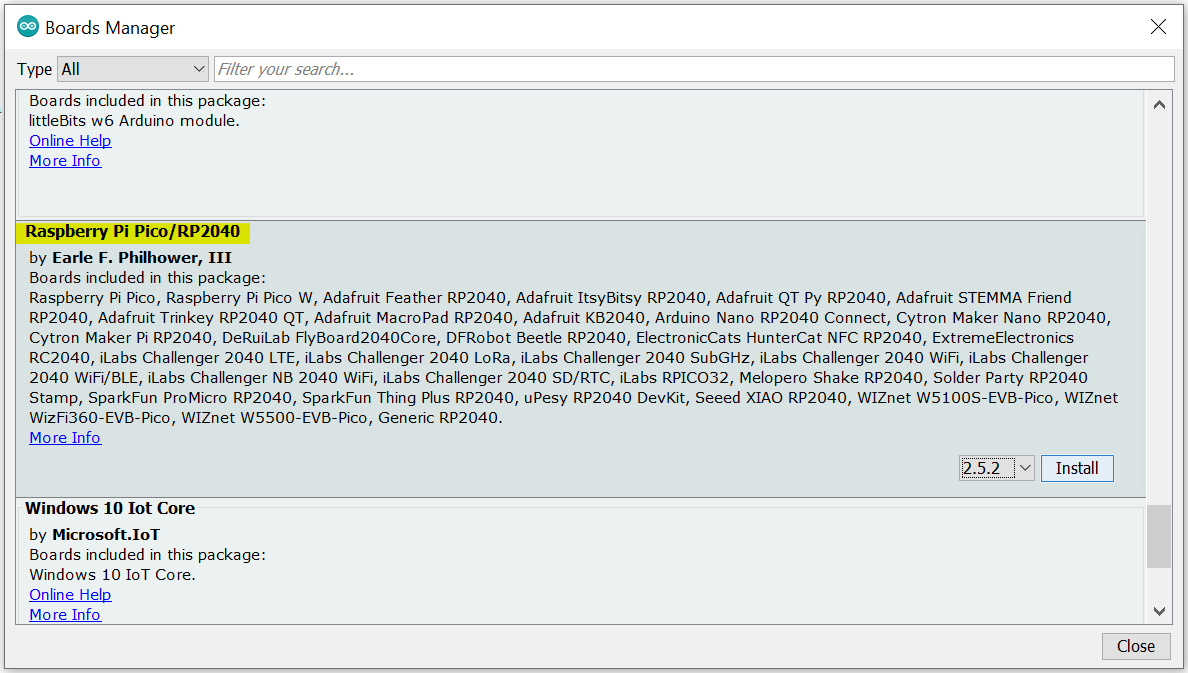
Click on the install button of the Raspberry Pi Pico/RP2040 package by Philhower
Note
The download may take a little while, depending on your internet speed.
When the installation is finished, you can change the type of board by choosing the Raspberry Pi Pico board.
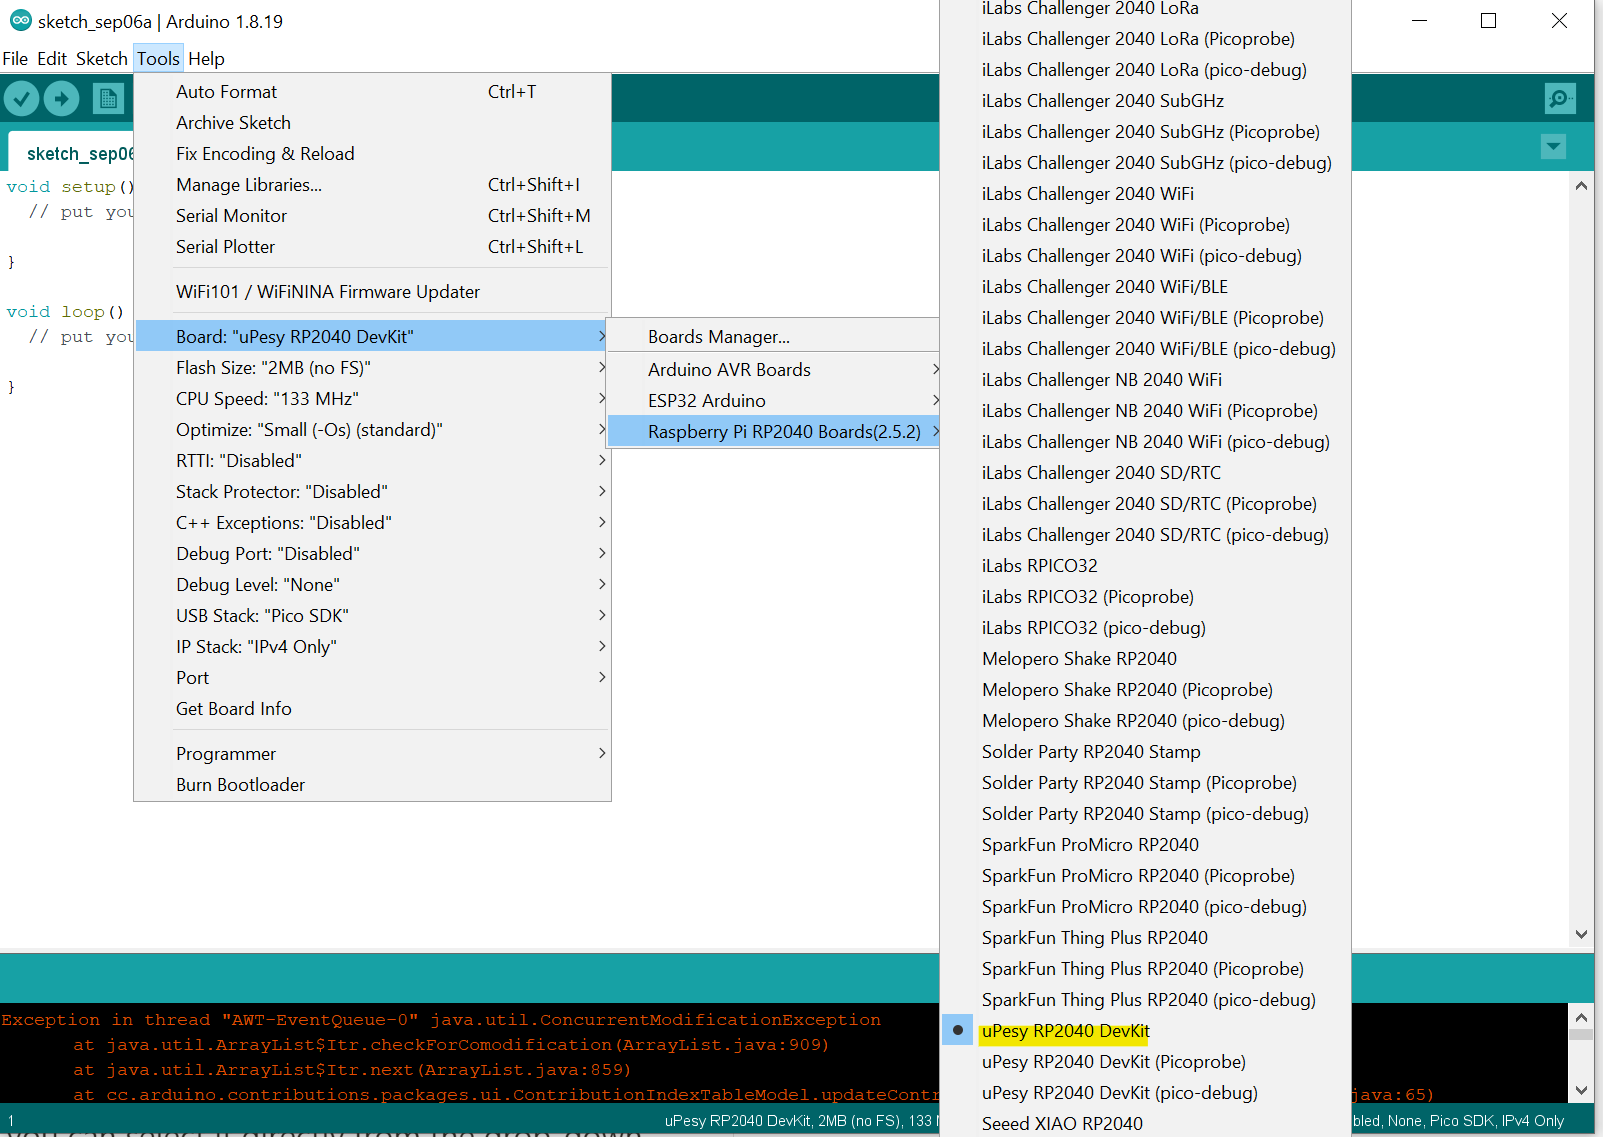
Selection of the board type based on the RP2040 (Here Raspberry Pi Pico)
Tip
If you have a uPesy RP2040 DevKit board, you can select it directly from the drop-down menu.
Upload a program to the Pi Pico
Uploading a program on the Pi Pico differs from that of the Arduino and ESP32 boards: For the Pi Pico to receive a new program, it must be in “USB” mode. If you have MicroPython installed on the Pi Pico, you must manually put the board in BOOT mode by pressing and holding the BOOT/BOOTSEL button when connecting to the computer. You cannot directly upload a program with MicroPython running on the Pi Pico.

Error while uploading the sketch: the Arduino IDE cannot access the USB mode of the Pi Pico
Warning
Remember to save any Python scripts in the MicroPython file manager before putting the Raspberry Pi Pico in USB mode. The new program will overwrite all flash memory.
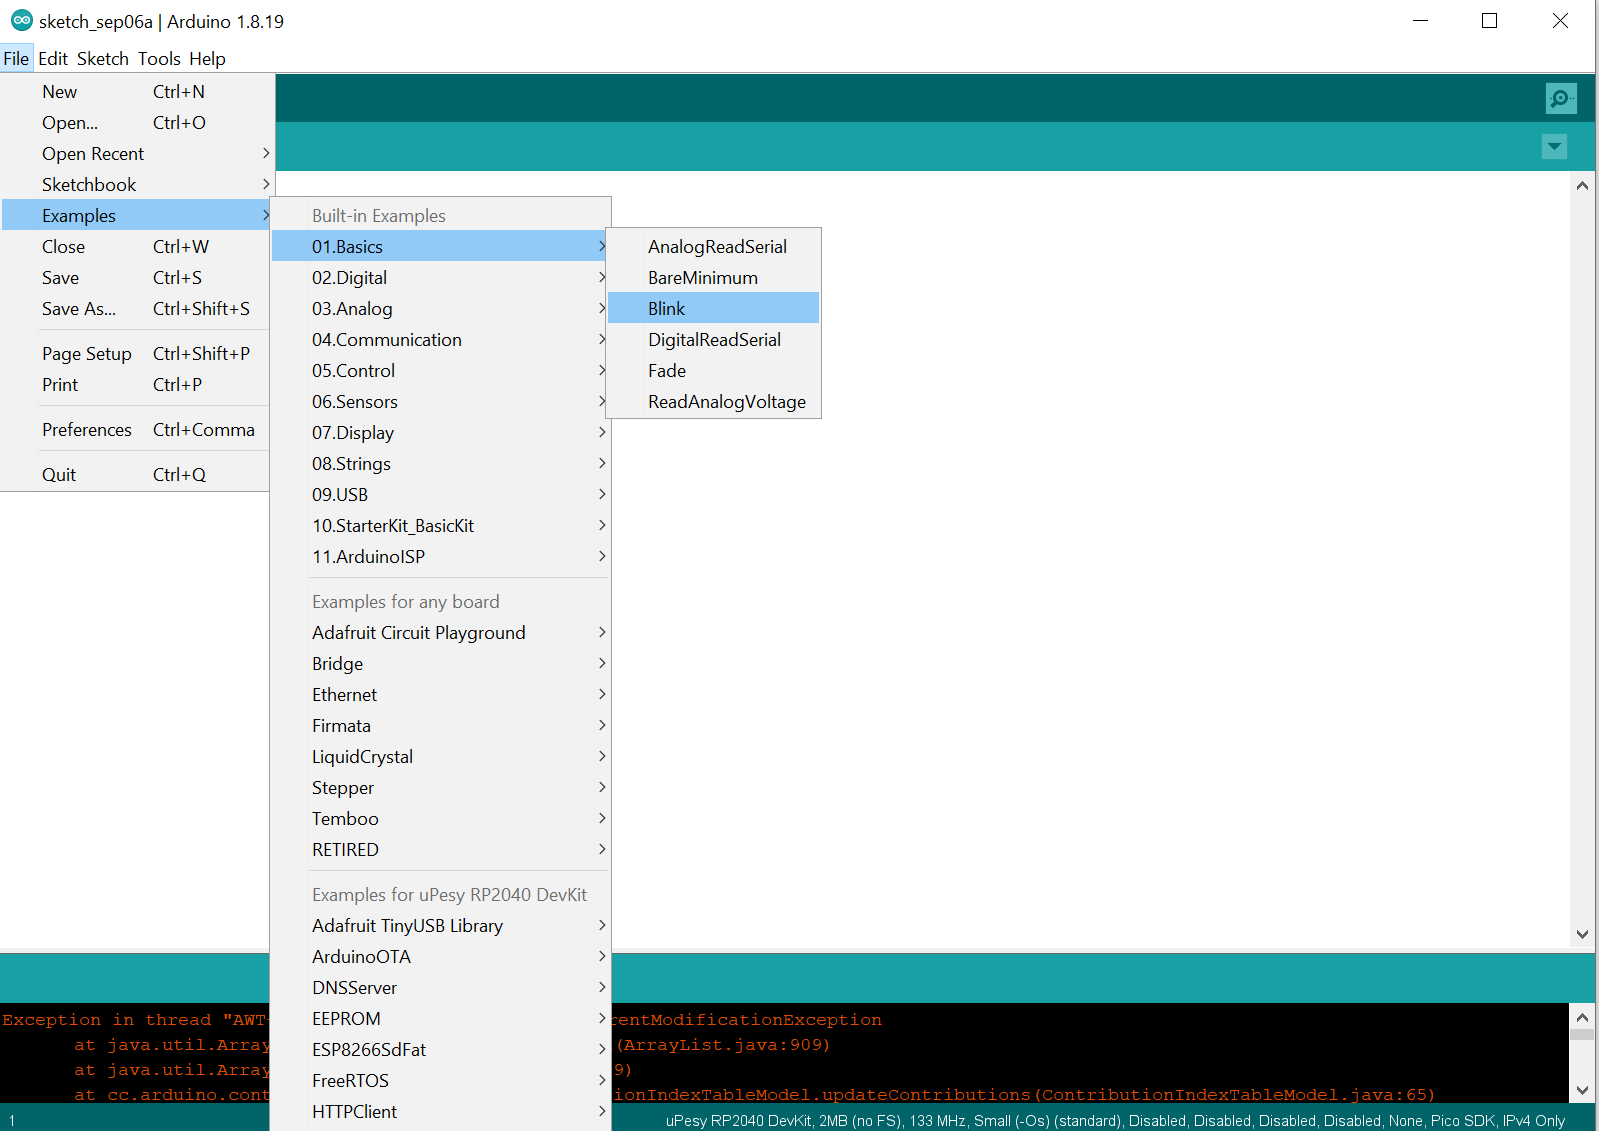
Once you have manually put the Pi Pico in USB mode, you can check that uploading an Arduino sketch works. You can take the example of the blink code accessible in Files → Examples → Basics → Blink, which makes the board’s LED blink.
You can also directly copy the code below:
void setup() {
    pinMode(LED_BUILTIN, OUTPUT);
}

void loop() {
    digitalWrite(LED_BUILTIN, HIGH);   // turn the LED on (HIGH is the voltage level)
    delay(750);                        // wait for a second
    digitalWrite(LED_BUILTIN, LOW);    // turn the LED off by making the voltage LOW
    delay(750);                        // wait for a second
}
Then click on the usual arrow to compile and upload the program. The first compilation takes a little time, but the following ones will be faster.

Uploading a program to the Pi Pico (Here, the COM10 serial port is used)
For future uploads, the Pi Pico will go directly into USB mode, so there will be no need to press the BOOTSEL button.
In fact, with each upload, the following happens:
The serial link via a COM port is stopped.
The Pi Pico board goes into USB mode: it behaves like a mini USB key.
The Pi Pico board receives its new compiled program with the UF2 extension: it is pasted into its memory.
The Pi Pico restarts by running the new program and reactivates its serial link.
Note
The only annoying thing is that you can hear the distinctive Windows detection noise during each upload.
Congratulations, you can now use the Arduino code to program the Pi Pico. You can now use your programs made for an Arduino and adapt them a little for the Pico.
Note
Since the porting of the Pi Pico with the code is recent, not all libraries may be compatible with the Pico.