
Installing MicroPython on the Raspberry Pi Pico
(Updated at 03/16/2023)
What is MicroPython ?
MicroPython is a Python interpreter optimized for microcontrollers like the RP2040 or the ESP32. You can develop Python scripts that will be directly executed on a Raspberry Pi Pico board or an ESP32. To do this, we install MicroPython on the board and then use software (Thonny IDE, for example) to write the Python script and send it to the board.
Note
On the uPesy RP2040 DevKit version, MicroPython is already installed. However, if you also use Arduino IDE to program the board, you must follow this tutorial to put MicroPython on it.
Installing MicroPython on the Pi Pico in 30 seconds
The installation of MicroPython is done by a simple copy/paste of a file on the Raspberry Pi Pico board. To do this, download the latest stable version of MicroPython from the official website in the format .uf2 . Before connecting the board, you must put the Pi Pico in “USB ” to transfer the firmware. To do this, hold down the BOOTSEL pressed while connecting the board to the computer.
Before connecting the board, you must put the Pi Pico in “USB” to transfer the firmware. To do this, hold down the BOOTSEL pressed while connecting the board to the computer.
Note
Remember to take a cable that transmits data from the USB. If you hear the characteristic noise of Windows when you plug it in, then it’s okay.
The Pi Pico board reveals its memory like a classic USB key in this mode. It is called RPI-RP2 . Just copy/paste the downloaded .uf2 file into the RPI-RP2 . The folder closes automatically, and the Pi Pico board restarts on MicroPython.
Hint
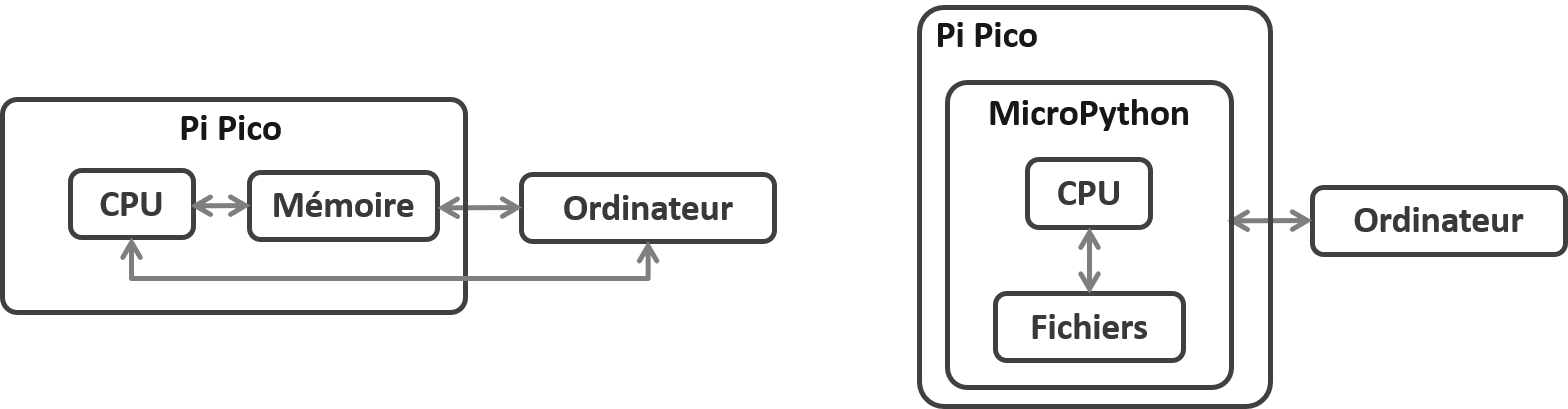
With the MicroPython firmware installed, it’s like having a primitive OS installed (MS-DOS for the specialists). Indeed, unlike Arduino code, you don’t send a binary program directly to the memory (which will then be executed by the microprocessor). Still, you send a Python script to Micropython, which will interpret and run it. There is even a file manager in MicroPython.
The MicroPython installation is already finished. Take your favorite code editor and start programming. However, you still need to be able to communicate with the board.
Warning
Remember to close the serial monitor of the Arduino IDE if the software is open; otherwise, you will be confronted with the following error Unable to connect to COM5: could not open port 'COM5': PermissionError(13, 'Access is denied.', None, 5) :

Indeed, two IDEs cannot access the same serial COM port simultaneously.
Communicating between the Pi Pico board and the computer
The Raspberry Pi Pico board with MicroPython talks to the computer via a serial link. This serial link is transmitted via USB
You can use several tools to communicate with this serial link
The easiest way is to use an IDE that manages this communication for us. It will handle both the text editor and the dialogue with MicroPython of the Pi Pico.
Note
This is what the Arduino IDE software does with the Arduino boards.
For MicroPython, the Raspberry Pi foundation’s software is Thonny IDE. However, you can also use the Mu software instead.
For VS Code enthusiasts, there is also a particular extension to communicate with the Raspberry Pi Pico.
Advanced programmers can communicate with the REPL (MicroPython Interactive Interpreter Mode) via a serial terminal like Putty or Minicom. There are also tools like ampy and RSHELL, which allow saving Python scripts and managing the file manager of the board directly from a console.
With all these tools collections, it is advised for beginners to use Thonny IDE . For those who already use VS Code, you can test the extension (there are others), then try other tools like Ampy and RSHELL.
Installation of the various tools for MicroPython
Thonny IDE
To install Thonny IDE, go to the official website https://thonny.org/ and then choose and install the correct executable for your operating system.
Tip
Thonny IDE is already on Raspberry Pi so you can program the Raspberry Pi Pico from a regular Raspberry Pi board. You may need to update it if it does not contain the MicroPython part.
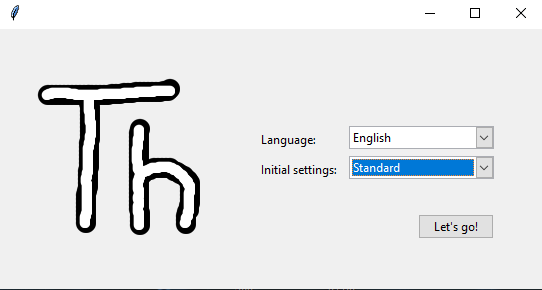
The Thonny installation is straightforward. At the first launch, you can choose the language.
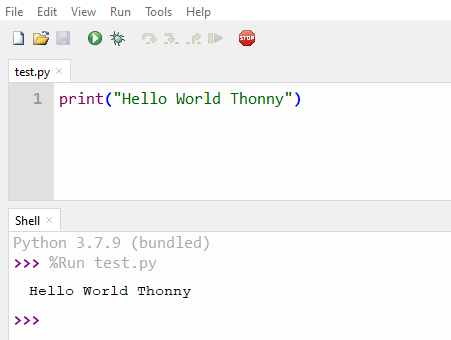
You get a classic text editor with a Python interpreter. On the other hand, it is the Python interpreter of the computer and not the one of the Pi Pico .
To fix this, just:
Select the correct Python interpreter by going to Run → Select Interpreter
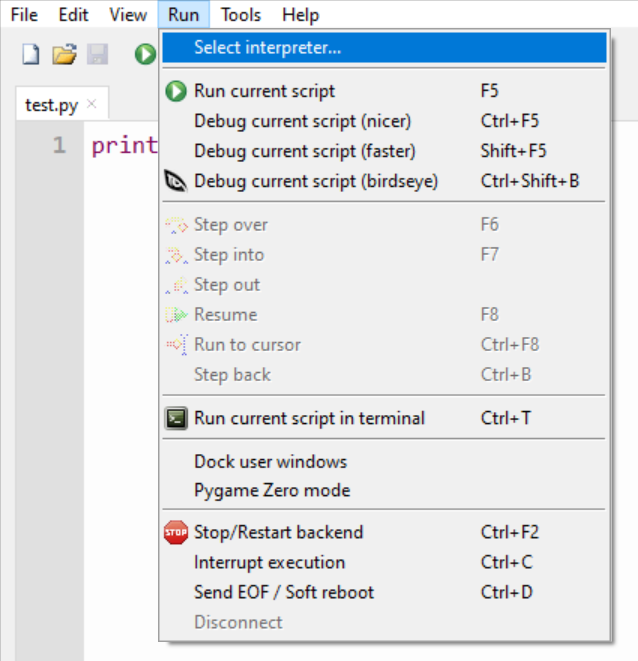
Choose MicroPython (Raspberry Pi Pico)
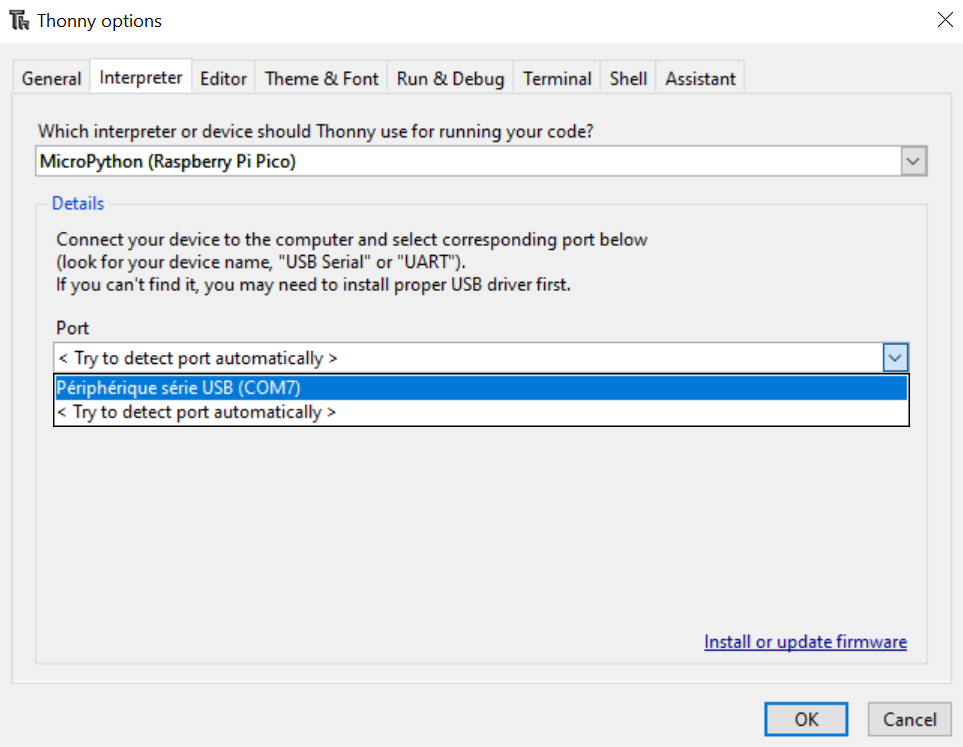
You can then specify the port that should be used if the Pico board is already plugged into the computer or let Thonny IDE automatically choose the correct port once the board is plugged in.
The MicroPython terminal should launch automatically:
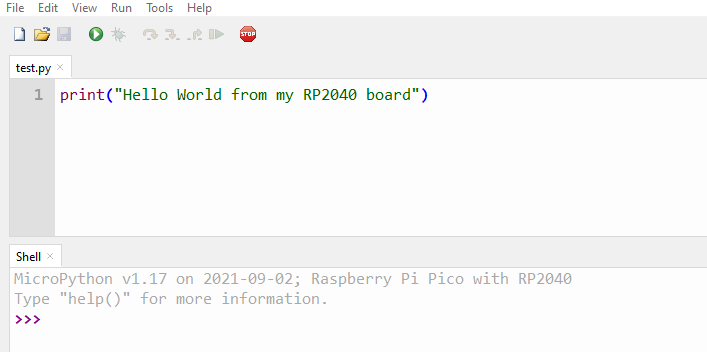
The old Python shell is replaced by the MicroPython 1.17 shell
You can try pressing the STOP button if the shell has not been changed. Of course, you must also connect the board to the computer with MicroPython installed.
Now you can start writing your first Python script on Thonny IDE :
import time
from machine import Pin

print("Hello World")
p25 = Pin(25,Pin.OUT)

while True:
  p25.on()
  time.sleep_ms(250)
  p25.off()
  time.sleep_ms(250)
I suggest you change the blinking time of the LEDs to see how fast the new code loads.
Note
When saving the source code, Thonny IDE offers you to keep it on the board or computer. Permanently save to the computer to avoid losing your code if you remove MicroPython.
If you are using a classic Raspberry Pi to program a Pi Pico board, I encourage you to read this article which details the installation and use of Micropython with Thonny IDE specifically on the Raspberry Pi 4 .