
First steps with the uPesy ESP32 Wrover DevKit board
(Updated at 01/05/2023)
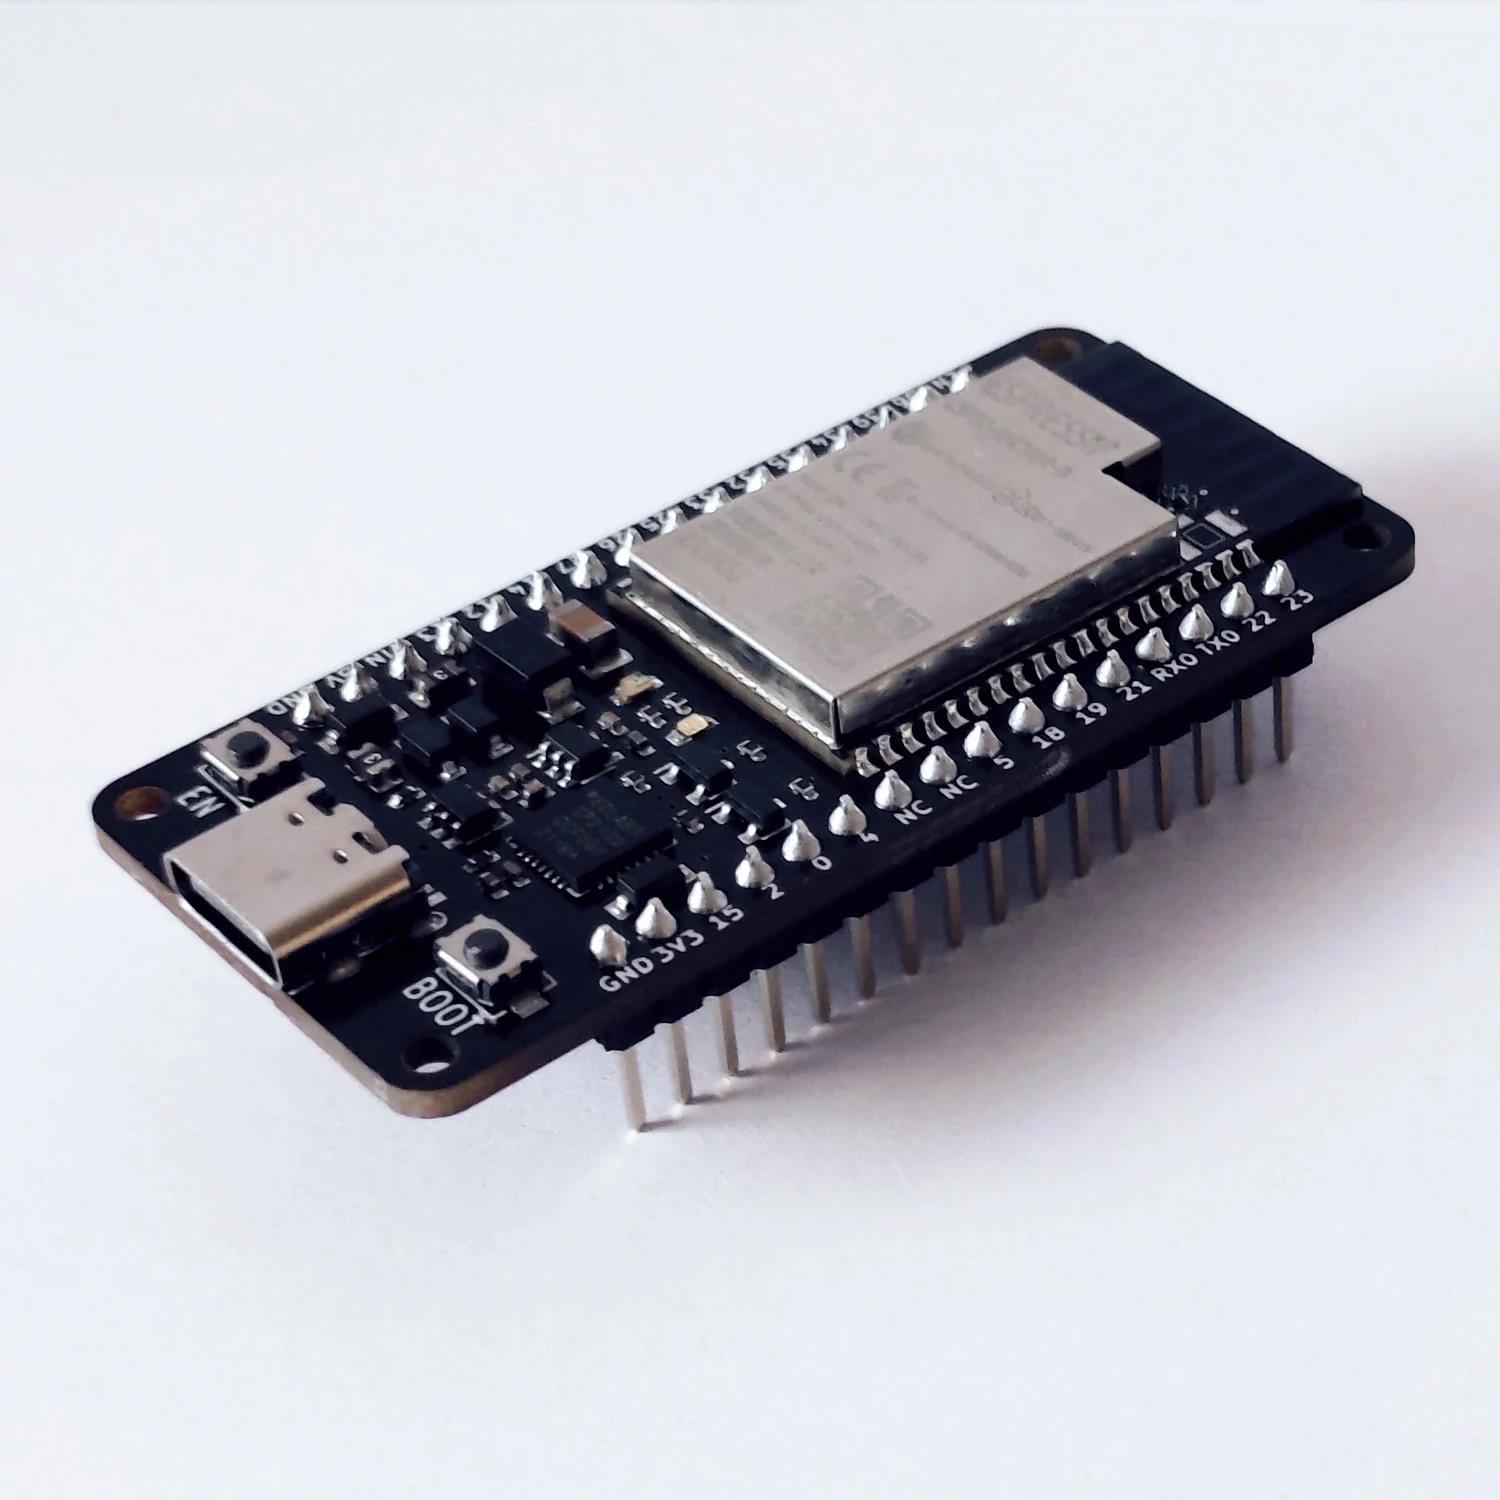
This guide will guide you through you first use of the uPesy ESP32 Wrover DevKit board : an ESP32 board with 4MB of additional RAM for your DIY projects!
Programming the ESP32: The different IDEs and languages
I guess you must know the basics of programming on the ESP32 if you get this ESP32 model. Programming the ESP32 Wrover module is done the same way as a Wroom module.
Note
There is no need to reinstall the tools if you have already used another model of ESP32 board.
Here are the links to tutorials to install and program the ESP32
In any case, you must choose the appropriate options to use the PSRAM of the uPesy board. The procedure is detailed below.
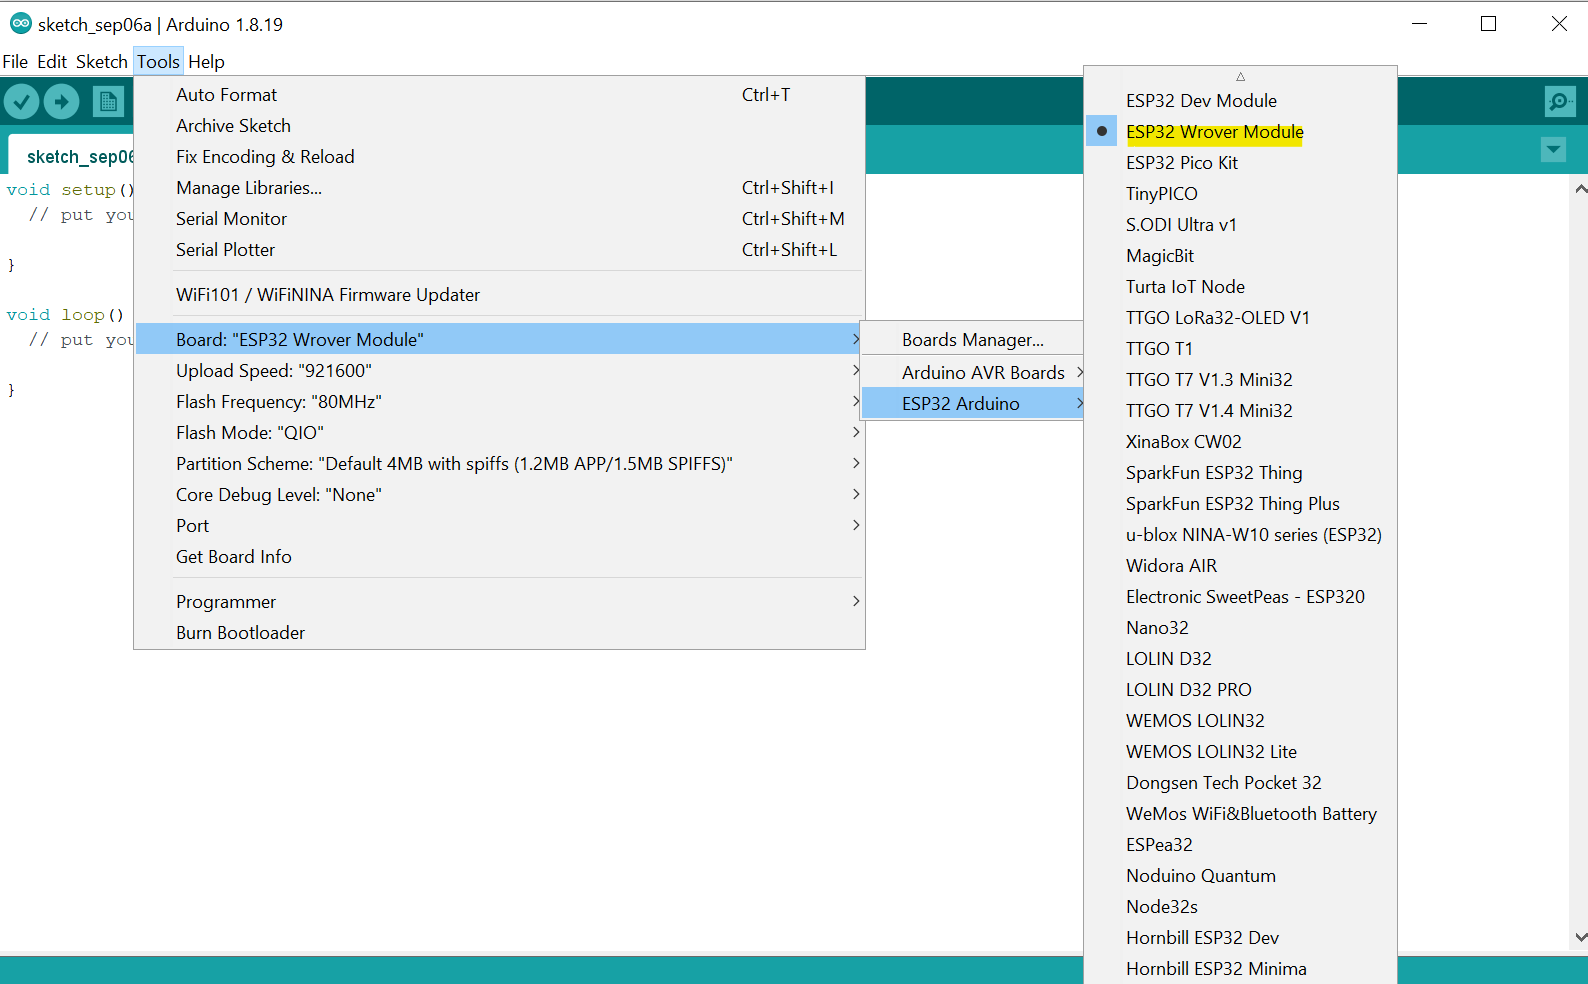
Enable the PSRAM on the Arduino IDE
To select a board model that uses PSRAM Tools → Board type → ESP32 Arduino → ESP32 Wrover Module
Note
uPesy boards are not available in the dropdown menu at the moment. They are, however, available on the repository Official Github Arduino-ESP32 and will be available in future releases.
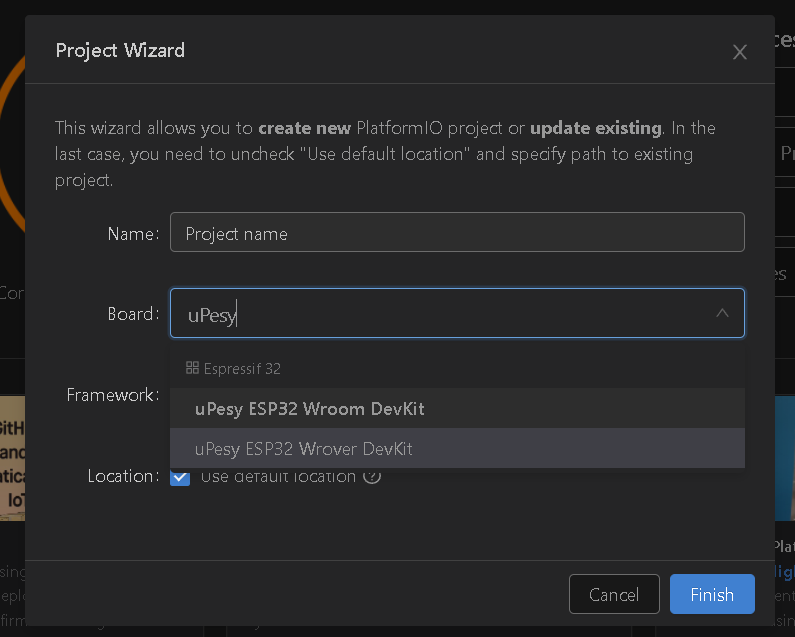
Enable the PSRAM on PlatformIO
Tip
The uPesy ESP32 Wrover DevKit board is available directly from platformIO.
When creating a project, you can directly select the uPesy template in the dropdown menu:
For an existing project, you can also change the ESP32 model in the configuration file platformio.ini

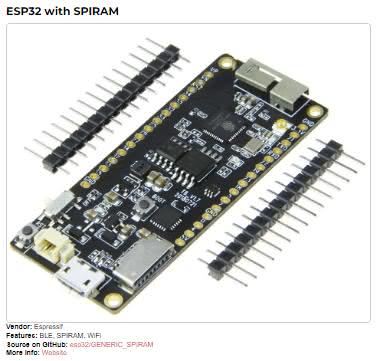
Enable PSRAM on MicroPython
PSRAM is natively supported with MicroPython if you choose the right binary for the firmware. You must choose the model ESP32 with SPIRAM
Here is a direct link to the binary of the latest version of MicroPython 1.19
Using the ESP32 Wrover PSRAM
The additional RAM is in a separate box from the ESP32 chip

PSRAM (in red) in the ESP-WROVER-B module, without the aluminium enclosure
Note
The ESP32 has an external RAM of 8MB (Physical), but in practice, only 4MB are accessible via the code.
Using PSRAM on MicroPython
MicroPython takes care of the work: The PSRAM is merged with the internal RAM of the ESP32.
Using PSRAM with Arduino code
With Arduino code, the PSRAM is separated from the classic internal RAM. To use it, you will have to manage dynamic allocations yourself (with malloc() ) or use a library that supports it, such as ArduinoJson , to manipulate large JSON files, for example.
See also
I recommend reading the detailed guide on using PSRAM with Arduino code .
Pinout of the uPesy ESP32 Wrover board
The pins are almost identical to those of the uPesy Wroom model, with a few exceptions: the GPIO16 and GPIO17 pins are not usable on the Wrover because they are used internally by the PSRAM. They correspond to the two NC pins on the diagram.
Note
No electrical signals are going through the two NC pins. You can either leave them as they are or connect them to the ground (GND)
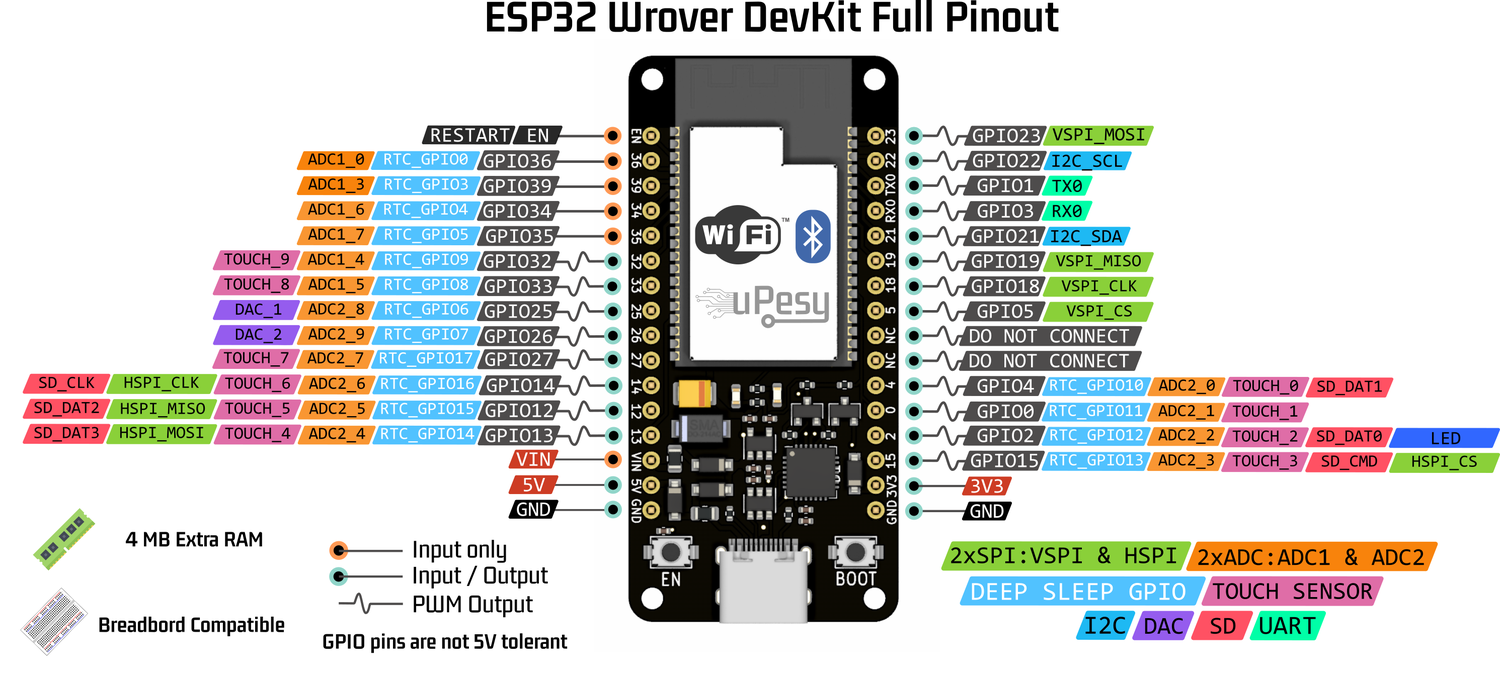
The indicated functionalities are the default ones on this detailed pinout diagram (ESP32 Pinout). On the ESP32, we can choose the pins that will use the SPI, I2C, UART, I2S, and DAC protocols. I strongly invite you to consult the tutorial on the detailed operation of each pin of the ESP32 (ESP32 Pinout) for more details on the ESP32 pins.
uPesy ESP32 Wrover Technical Documentation
To finish the discovery of this new board, I strongly encourage you to read the documentation of the uPesy ESP32 Wrover board ; please refer to the following pages to learn more about its technical features and recommendations for use, including how to power it.
Learn programming on the ESP32
A series of tutorials are available to progress in programming the ESP32 according to your chosen language. You will find in the section Programming tutorials to program the ESP32 with Arduino code and tutorials to learn the basics of MicroPython .
Note
Example codes with the PSRAM are available on the page dedicated to using PSRAM with Arduino code .